Technique - A Rødelink Filmmaker transmitter with a USB-problem
Word upfront
In my opinion, a micro-USB connector has nothing to find on (semi)-professional AV-equipment and I consider the chance of me actually using this connection (especially on the transmitter) to be very small. Even so, I found I had to resolve this issue.
I warn you: Do not even attempt this if you don't have a soldering-iron with a gullwing point, a preheater or hot-air station!
You don't know what that is? Right. Don't attempt this than.
The problem
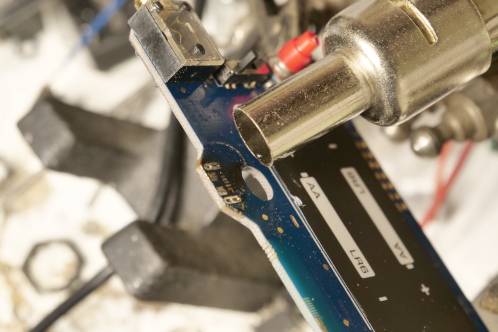
 When I bought this set as a second hand in 2022, I immediately noticed the micro-USB connector to be mounted off-set from the opening in the housing.
Even so much off-set I couldn't even get a cable in.
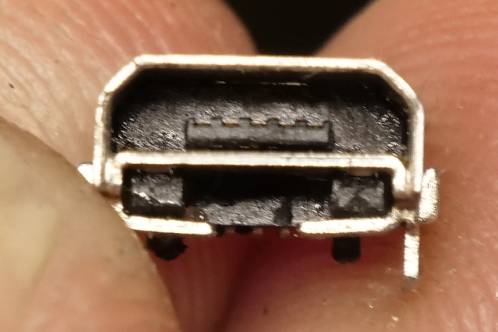
I first thought the PCB inside was mounted wrong, but opening the unit up I found the connector itself to have been soldered wrong. Blobs of solder gave the impression someone had already been poking around in this thing before...
The botched solder-job wasn't the only problem. Even now I could not get a cable in, as solder had also accumulated INSIDE the connector.
Lets open it up!
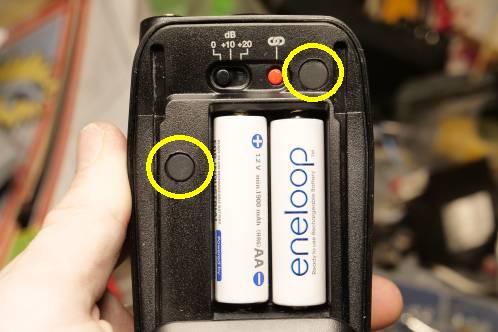 Fortunately, opening this unit isn't hard. First slide open the battery compartment and remove the batteries.
Pry out the two rubber covers over the screws with a small flat screwdriver from the part that holds the batteries. Be aware that these covers are not identical and need to be placed in their respective position afterwards.
Remove the two Torx screws. Fortunately, this can be done with the average screw-bit, the screws aren't in very deep.
The top and bottom half should now detach from eachother. In both my transmitter and receiver, there's also loads of hot-glue around the edges of one of the plastic parts: I have no idea why, as without the glue the unit stays together really well.
Pay attention you don't lose the red 'link' switch button and dB-switch button! In my unit these stayed on their respective switches, but it would be a pity if you do lose them.
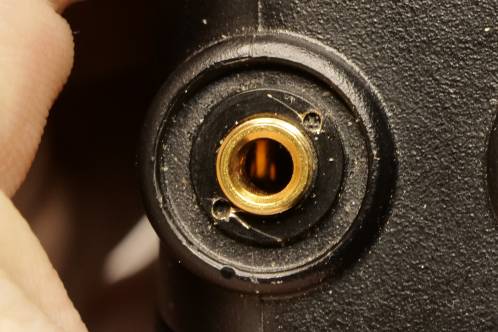 After removal of the casing, you will have to remove the 'blind nut' from the jack-barrel connector, by using a fine pair of pointy pliers, put into the two small holes of the round nut.
There's probably a special tool for something like it, but the pliers work fine. I had to ask my mom though, I did not have one that fit the small holes and even with my moms fine tools, I unfortunately damaged the nut after a slip a few times.
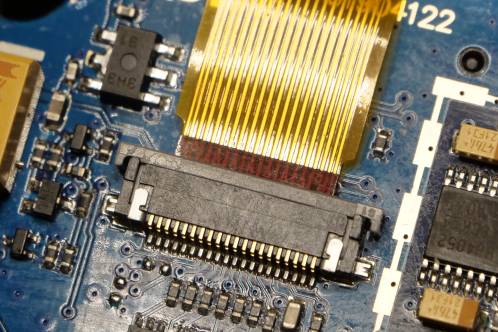 Now carefully remove the flex-PCB that connects the small PCB with dB-switch, on/off switch and LED-display with the rest.
Slide the small handle on the connector towards the jack bus in order to do this.
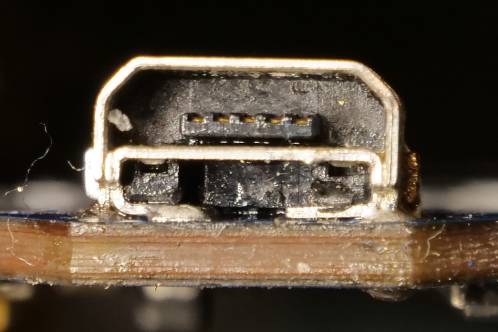
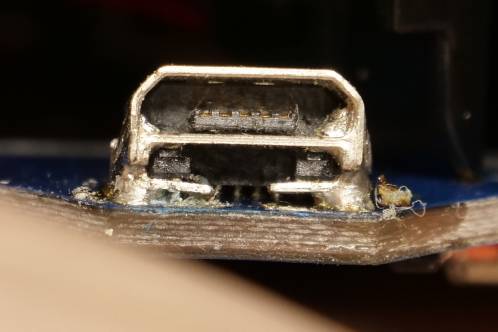 And opened what I saw earlier: An extraordinary badly soldered connector and the solder also in the lower corners of the connector itself.
Clear rosin-stains give an impression someone already had a go at this.
Did this get through quality control at Røde? I can't imagine...
Removal, cleaning and resoldering
 First lets get this connector out to see if I can remove the solder from the inside. If I can't even get the latter done replacing it is my only option and I have to hope this is not some special variant.
Removing it was nothing short of tough: the PCB is of a very sturdy type and only with hot-air set to 360 degrees Celsius and high airflow, I was able to remove it from the PCB.
Cleaning the soldering pads and the four holes that take care of a mechanical sound connection, I had to heat the PCB on the bottom-side with the hot-air station set to 180 degrees, to use my 80 Watt Weller with a wide chisel-type point and desoldering braid to get the job done.
If you just have a soldering iron, you can forget about this.
 Cleaning the connector was done by just filling it up with flux. Sticking thin desoldering braid inside and than warming the connceros' 'outside with a soldering iron managed to remove enough solder to get a cable in afterwards.
The 5 connections on the back were also cleaned with flux and desoldering braid.
After repeating this process a few times, the connector was put in an alcohol bath, to start brushing with a stiff bristle brush afterwards. On the picture you can see some flux-residue, so the alcohol rinse was repeated.
 The toughest part of this ordeal was still to come: resoldering the thing. Not because I had to heat the bottom side of the PCB again, but because I had no idea if I would be able to keep the solder out of the connector.
Especially alot of flux and applying very little solder and working the mechanical connections with a gullwing tip, made sure the connector remained open.
With the gullwing tip and flux the connections at the back of the connector were soldered. With a lot of alcohol, a stiff bristle brush and a small cloth the flux residue was removed. I also tried to clean the connectors' inside as thoroughly as possible, but the picture shows some remains.
But, all in all, not a bad result. The USB-connector is now at least flush with the PCB, allthough the right 'flap' has not completely flowed with solder.
As the chance of me actually using the connector is very small, I consider it acceptable in this case.
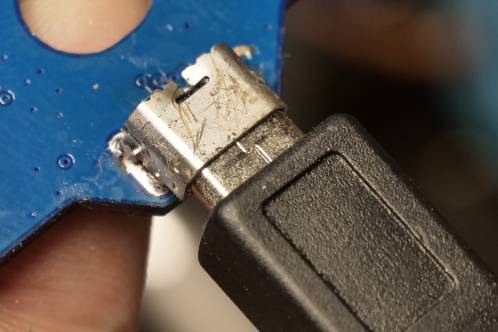 Before putting everything together I did try to see if a cable would fit. And fortunately, it did.
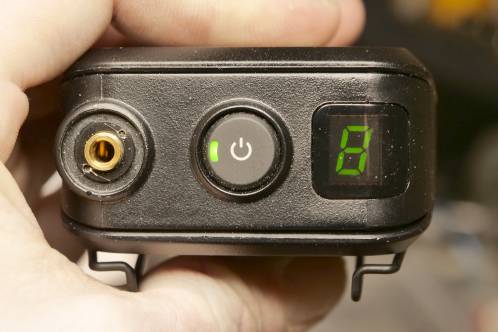 Before final assembly, I also tried to see if the unit would actually be powered by micro-USB. I got a power supply and... yes, everything turns on.
I repeated this short test with 2 AA batteries, but that worked as well.
I than put the screws back in.
Warning: The screws in my unit had to be tightened to a point close to overtightening to prevent an annoying rattling noise when moving the unit.
Maybe the hot-glue was preventing this, but as tightening the screws even further also made the rattle disappear, I can't say for sure if this is the cause.
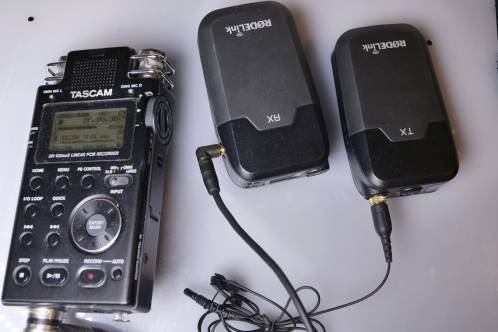 And when all is done, the unit undergoes a final test. A microphone is connected to the transmitter and the receiver to a recording device. A recording is started and reviewed later. Everything works like it should.
On the picture you see the set working on AA-batteries, as the micro USB-cable kept pulling the unit out of image. Ofcourse, you also test that.