Technique - Repairing a V-TAC VT-6060 LED-panel
A word upfront...
Well... this isn't really a repair, because the most important part was damaged beyond repair, but hell.
On a walk with a friend, I saw this LED-panel laying in the overgrowth, probably dumped with the excuse of corona (in the city of Purmerend, where I live, the environmental facility got extremely busy and queue's could take you an hour or langer before you got to dispose off your materials).
As I had been searching online before to find a supplier for the plates that spread the light in those things and because my experience is that the power supply is the main issue 9 out of 10 times and not the LEDs itself, I got it out of the bushes and took it home.
After coming home... I continued the walk. I started investigating in the evening. The plate that covers the back was mounted with quite a lot of screws and a few had quite some rust on them. The backplate itself also showed obvious rust.
Workingprinciple
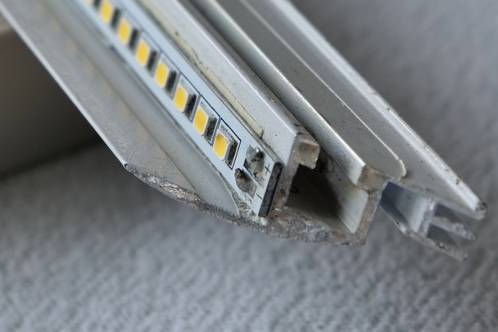
These panels are easy to explain. At both sides in the aluminium brim, a LEDstrip shines its light directly into the edge of a special acrylic plate with special laser-made engravings that break the light and throw it to both flat sides of the plate. A reflector on top of this plate bounces the light back down, and another plate at the other side of the light guide plate makes sure the light is spread out evenly.
 Because of the high number of LEDs, these are usually in series and multiple groups of these are in parallel. The total forward voltage therefor is rather high, while current drawn also adds up.
Once opened, it proved I was not in luck this time: there was clear waterdamage and many LEDs showed burn-marks. Out came the vinegar and old toothbrushes to at least remove the corrosion from the PCB's, but when switched on, it proved to be really defective.
In almost every series-chain of LEDs at least 1 LED had died, resulting in the whole chain not working anymore. This is also the reason I'm not too fond of this configuration, more on that later. The picture even shows the 'best' one. The other LEDstrip didn't have a single LED lit.
To get a better view on the LEDstrips, I completely disassembled the panel. This proved to be simple. Each profile is attached to the other by small metal corner profiles, locked via small setscrews. These showed quite some corrosion as well. After everything had been taken apart, all the profiles got a thorough clean. There was dirt, concrete grit and other stuff in there.
So... now what?
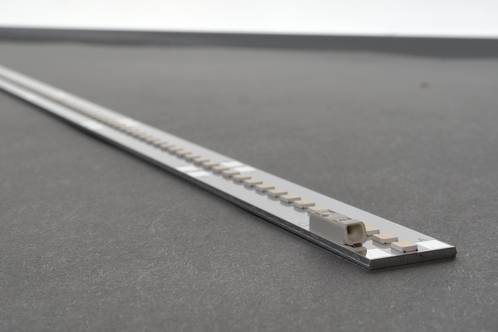
I have to admit, I got stuck for a while. The LEDstrips in the panel are of the rigid type, an aluminium-core PCB to cool the LEDs. The length deviates from the standard multiples-of-5 centimetre strips you usually find online, measuring 58 centimetres in this panel.
Besides the length, the strip is also unusually narrow with only 7 mm, against the 10 and 12 millimeters of commercially available LEDtapes.
Like all that isn't enough, I also have to take total height (PCB+LED) into account.
Besides solid-PCB LEDstrips not being all that common, I also wanted a neat color-reproduction. I did not want to mount some cheap (and thus bad color-reproducing) strips in this thing. If I found strips that matched on size, their quality was highly questionable.
LEDstrips from LED-tech.de
 On my search, I ended up with this German company, with a wide selection quality LED-products. I quickly landed on the LEDstrips with Samsung LM301B LEDs.
Their total height was nearly identical to the existing strips and the length of 50 centimetres was adequate as the connections to the strip were besides the LEDs, instead of at the outher ends. I stopped searching when I saw the CRI90 variant, with a nice color-reproduction index.
I only needed two strips, but ordered one more in case I would wreck one. They're pricey at about twenty Euro per strip, especially when you take the new price of such a panel into account. But I would fit it with far better LEDs than it originally held.
Narrowing down the LEDstrips...
There was only 1 problem: the strips were too wide. One side needed to lose about 5 millimetre of material. I thought about simply using my Proxxon with a milling-bit, but aluminium keeps being a pain in the bum when you don't have the right mill-bits for it. My Proxxon didn't like it at all, so out came the cut-off wheels.
 That was quite the dangerous operation, because a slip of the tool could end the life of one of the LEDs right away. Well, about 3 hours, 7 cut-off wheels and especially a lot of fine dust later, I had resized the first strip.
Fortunately, all LEDs still worked, despite a real slip of the tool (right at the very end, of course!). But I was not looking forward to the next one...
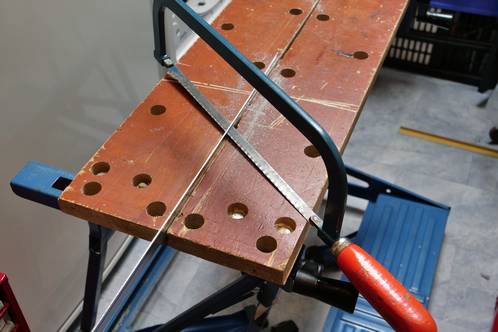
I entered the attic to see if I could find a better way to do this. And so I did (fortunately). This metalsaw isn't anyone's favourite here inside the house because of the awkward handle. That awkward handle however, does provide the possibility to turn the sawblade 90 degrees.
My dad's rather worn Work-Mate had just the right amount of grip left to keep the LEDstrip in place. Please pay attention not to crush a LED, as they really won't survive.
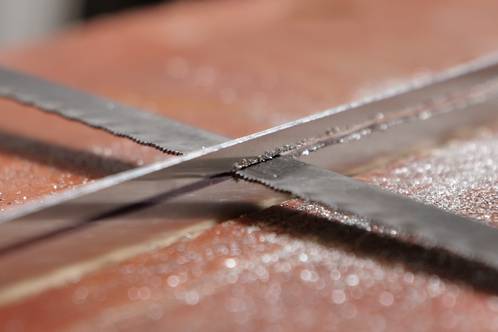 Though sawing still wasn't easy, it was far quicker than messing about with the cut-off wheels in my Proxxon and I could hardly damage a LED. It took me about 20 minutes to finish this one and then clean up the place.
After burr-removal with a nice wide file, I soldered wires to the strips and tested them in the aluminium profiles with the light-guide plate in place. And they worked.
More cleaning and putting stuff together
In high spirits, I thoroughly cleaned all the plastic plates, showing that especailly the light-guide plate was extremely thilthy, making light-output rise significantly and making large part of the weird spots disappear.
A flat screwdriver was pushed underneath one of the LEDstrips to (hopefully) remove it from the aluminium brim. I got lucky that it went almost effortless and I hardly had to deal with sticky remains left behind.
 The brims that would have to hold the new LEDs were thoroughly cleaned on the inside. Besides damage by water, they were also coated with a layer of white lacquer. Not a good idea for heat-transfer, so with my glass-fibre brush, this layer was removed.
I degreased the strips with alcohol and stuck double-side tape to it. Heat-conducting tape probably works better and LED-tech sells it, but I wanted to see what I could do with this. I can always change it later.
A steel brush was used to clean the right angle profile to get rid of the corrosion here and there and was then assembled again.
 After carefully leading the wires through the hole in the backplate, I applied power to them (read: I used a current limited bench power supply).
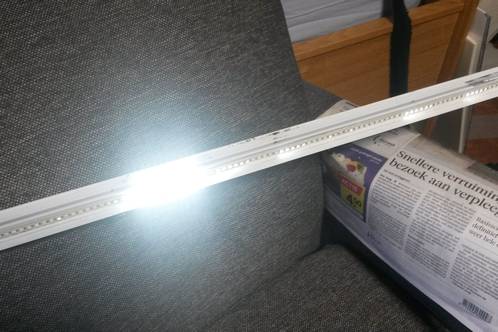
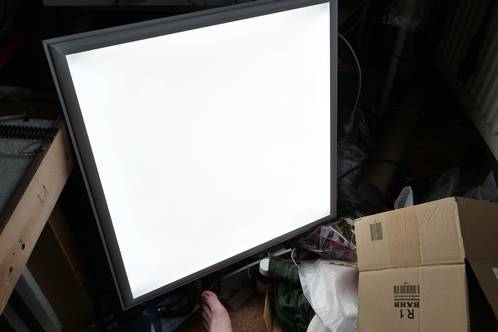
And there was light! (And darn, quite a lot too)
Main advantage is I can now find a power supply myself (maybe even with a possibility to dim the output) and I can let the panel run cool.
Great difference with the most panels available commercially, that show quite high temperatures that sometimes makes me doubt if the LEDs aren being pushed a bit too much inside.
The LED-configuration: higher reliability
On the original strips, you will find the LEDs in a 12S8P configuration, meaning 12 LEDs in a group are in series, with 8 of those groups parallel to each other. The Samsung LM301B strip is configured exactly the other way round, here's why.
The reason is reliability and light-output. In the serie-parallel chains, one defective LED will make the whole chain of 12 LEDs go out of service and cause a significant fallback in light-output. Besides that, the current through the remaining chains of LEDs will rise. This will increase the chance of failure of other LEDs, until there's no end to it anymore, as the driver won't know any better than to keep it's output current up to spec.
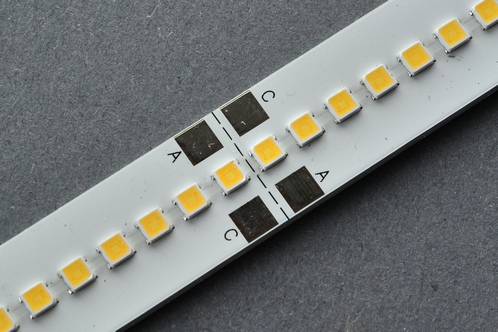 That's why the Samsung LM301B strip has its LEDs in a 14P7S configuration: every group consists of 14 LEDs parallel, with 7 of those groups in series (for a total of 98 LEDs).
In a series-chain, the current flowing is the same everywhere and that's where this configuration shows its advantage.
1 Defective LED in the group will result in a slightly higher current through the groups' remaining LEDs, but the rest won't notice a thing. Besides, all the other LEDs in the group with the defective one will keep working. That's nice in a 'device' like this.
Of course, the LED then has to fail 'open' and not cause a short. Fortunately, failing open is far more common than causing a short.
Because of this different approach, both LEDstrips will have to be fed from both ends, which makes for a bit more wire inside it compared to the original.